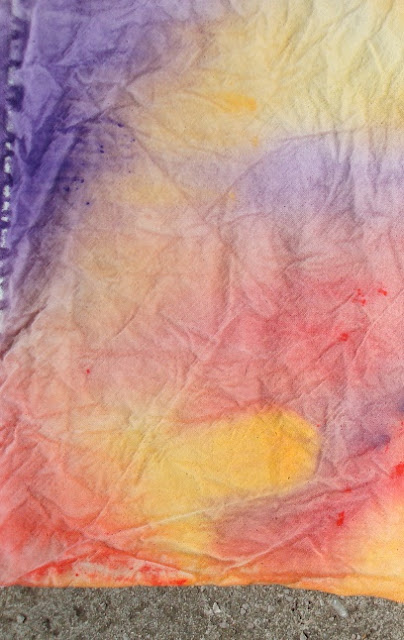
Last week my friend, Jen and I decided to experiment with fabric painting. It is fascinating to see rich wet colors melt into the weave of cloth. Perhaps I can inspire you to try it too!
You will need:
- Acrylic paints in assorted colors
- Brushes and sponges
- Spray bottle filled with water (optional)
- Containers for water (We used some old yogurt containers.)
- Containers for mixing paints (Any old plastic container, preferably shallow, will work.)
- Fabric (We washed our fabric first and let it hang to dry in a crumpled fashion.)
- Plastic sheet to protect your work area
Now it's time to get started!
Squeeze out your paints and mix as desired. (Jen made a lovely aqua blue.)
Wet your fabric in the sink or using the spray bottle.
Lay the fabric on your protected surface.
 |
| Water-soaked medium weight canvas cloth |
Using a brush or a sponge, begin to work the color into the weave. Don’t be too shy about the amount of paint you use. Remember that the colors will fade as they dry.
 |
| Brush work |
 |
| Sponge work |
If you want a more watery look, spray more water on the cloth's surface.
 |
| Sprayed surface |
Once you have painted your fabric, lay it out to dry. (We laid our fabric out on the concrete walkway in the sun. It dried pretty quickly!)
 |
| Drying on the cement |
After your fabric has dried, you can press it with an iron to set the color. I used an old damp rag as a barrier between my iron – which my husband also uses for his work shirts! – and the painted cloth.
Wash in cold water (no soap needed) and hang to dry.
Here are some examples...
 |
| Pink and green swirls |
 |
| Color riot |
Other ideas:
- Start with a dry piece of cloth, work the paint into the cloth, and spray with water.
- Use a leaf or other object as a stencil.
- Try painting ribbon or lace. We painted some ribbon and then tied it twisties to create a tie dye effect.
What do you think? Want to give it a try?
To see more examples, check out Freestyle Fabric Painting Expressions.
To see more examples, check out Freestyle Fabric Painting Expressions.

looks fun! :D
ReplyDeleteHave to try this sometime!
ReplyDeleteThanks for this fun tutorial! It's just up my alley. Your painted fabric is so pretty.
ReplyDeletenever thought of doing this.... looks like fun!!
ReplyDeleteThey turned out lovely! I use a similar technique on my silk scarves sometimes. I am Viennese, and the painters you mention in your 'about me' are my favorites, also :)
ReplyDeletelovely share thank you:)
ReplyDeleteWhat a fun and creative tutorial! Thanks so much for sharing :)
ReplyDeleteYour newest follower,
Laurie
createdbylaurie.blogspot.com/
Many thanks for all of your comments! :)
ReplyDeletelove this tutorial, cant wait to try it!! (etsy newbie)
ReplyDeletetheinspiredlens.blogspot.com
Thank you so much for lovely painting you shared.
ReplyDeleteHoorshid